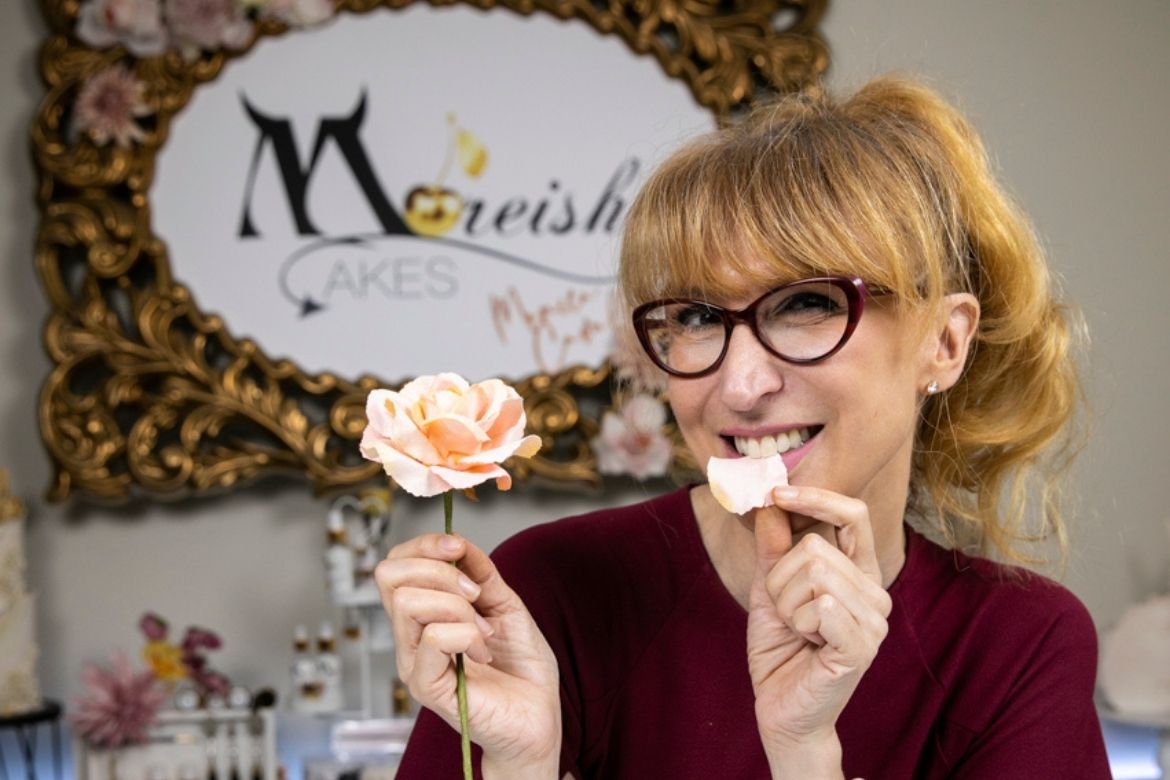
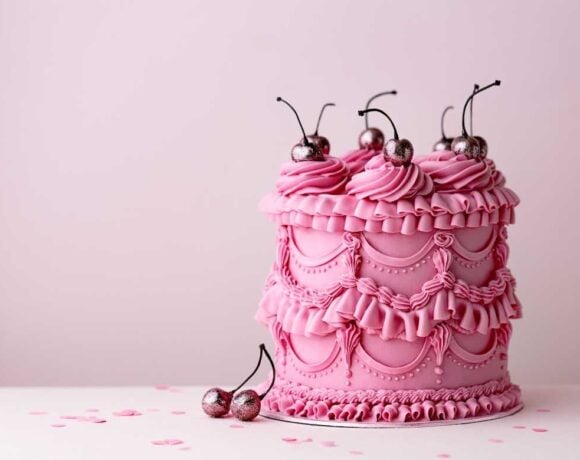
Anyone can make a cake, but Moreish Cakes’ Monica Cavallaro has carved a career from making cake an art form. In fact, Monica’s hyper-realistic flowers have landed her the job of making the wedding cakes on cult reality TV show Married at First Sight, making weekly themed cakes for Zumbo—Just Desserts (2019), appearing as a guest chef on Adam Liaw’s The Cook Up (2021), and that’s just the beginning! Baking Business is honoured to have Monica show us the secret to creating her iconic wafer roses.
 About Monica: Moreish Cakes director Monica Cavallaro wears many hats including cake designer, baker, pâtissier, teacher, demonstrator, recipe creator, presenter and judge. A runner-up on The Great Australian Bake Off in 2016, Monica’s position in Australian cake royalty is unparalleled. In addition to her incredible cakes, Monica created the More range of caking and baking products—several of which are used in this method and available to purchase on her website.
You can find more of Monica’s creations at: Instagram: @moreish.cakes Facebook: @MoreishCakesAustralia and MoreishCakes.com.au
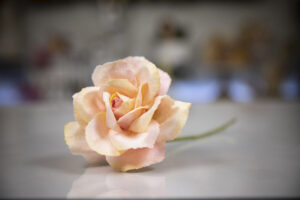
Wafer roses with Monica Cavallaro
Makes 1
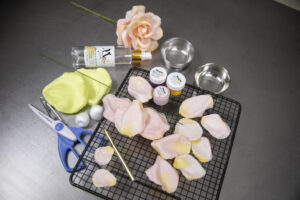
WHAT YOU NEED
A large non-slip silicone mat or a stainless-steel bench (colours stain your bench/tabletop)
A cake cooling/drying rack
Clean, sharp scissors (craft edging/texturing scissors if you have them)
3 small bowls
3 spoons
3 clean paintbrushes, 1 wide
Edible wafer paper sheets
1 15cm 18- or 20-gauge green flower wire
1 15cm 26-gauge green flower wire
30cm green floral tape
1 3-4cm Styrofoam cone
1 set of rose petal veiner (available from specialty cake equipment suppliers)
Hot glue gun
Colours: Edible Art paints in plum, yellow, pink and green
Petal dusts in any of the above colours
2 deep green petal dusts
More Curl
More Hard
NOTE: More Curl and More Hard are products developed by Monica and sold on her website, as well as at various cake supply stores. However, if you can’t get your hands on any, you can create a curling solution using vodka and glycerine to replace More Curl, and make your own sugar glue to replace More Hard.

WHAT TO DO
Make your edible glue at least three hours beforehand by mixing ¼ teaspoon of More Hard to 2 tablespoons water in a bowl. Leave to develop and mix again in 1 hour.
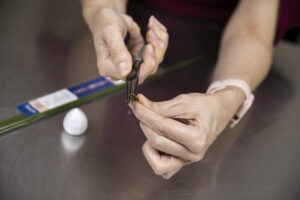
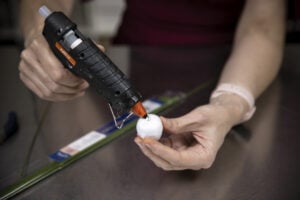
Bend the end of an 18- or 20-gauge wire into a semi hook then, using the hot glue gun, place a little hot glue on the hook and thread the wire into the Styrofoam cone. Put aside to set.
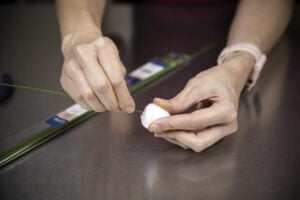
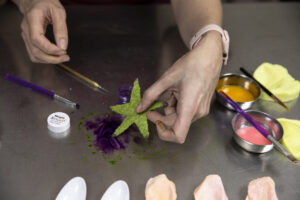
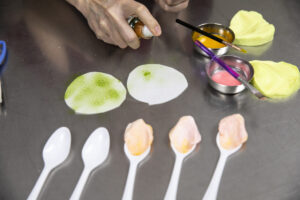
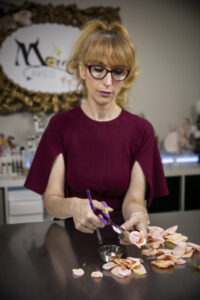
Using a paper cutter or scissors, cut 12 x 3cm disks and 30 x 5cm disks from the wafer sheets (you won’t use them all), 2 leaf shapes, and a star shape for the calyx (base of the rose).
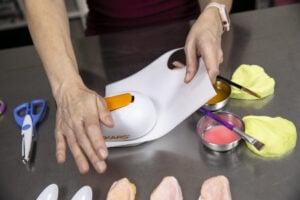

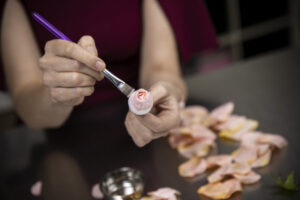
Decant some More Curl into 2 to 3 small bowls and colour them to your desired shade. Use a brush to paint the colour on each petal/leaf/calyx—this is your chance to create the look you want.
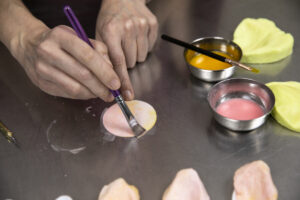
Place two petals together while still wet on the rough side and press together. Ensure they are soft and pliable when you do this—it usually takes a couple of minutes on the cake cooling rack to be ready for the next step.
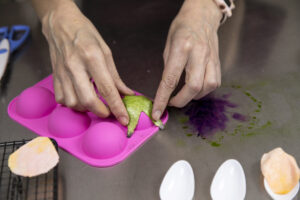
Place into a rose petal mould and press down for 10 to 15 seconds. Remove the top of the mould and leave the petal in for a few mins to dry a little while you are preparing the next petal. When removing the petal from the mould to replace with a new petal, I suggest placing the moulded petal into a half-sphere mould or a spoon to keep its shape while drying. The calyx can also be shaped with the half-sphere mould.
Select three petals—they can still be soft and not dry to create the bud—then using the edible glue you created earlier, glue the petals to the Styrofoam cone. Ensure the last petal is tucked under the first petal. It is ideal that the bud is created tightly by wrapping the petals around the Styrofoam but not pushed in, so it keeps the veins.

Add the next row of four petals, tightly wrapping the petals again—the bud is starting to form, and the edges are curling outwards.
Add the next row, keeping an eye on the “bloom” of the rose.
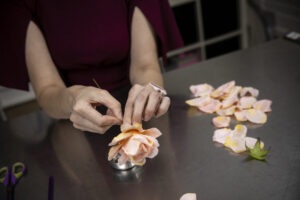

With the next row, start to ensure lightness and bloom in the petals—the rose is starting to open, so the petals are softly placed, only attaching at the bottom.
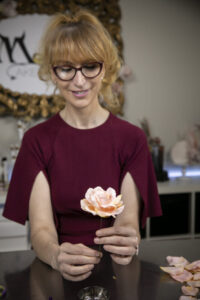
Next, the petals need to be peeling outward, ensuring the bottom of the Styrofoam is now covered. While the rose dries a little, add the calyx. Add the final details by taping the leaves (or you can use a little sugar glue or wire) and completing the rose stem.


Kathy
22 January
wow this is awesome. Love her. Thanks for sharing.