There is a strong spirit of individualism in today’s cake businesses, with both customers and decorators celebrating their own personality with colour, texture and creativity.
GET OUT YOUR PAINTBRUSH
Bakers and pastry chefs are creative souls, with a keen sense of balance, design and colour. So why not pick up a brush and convert this artistic energy into a painting?
For a growing number of cake designers, hand-painting is giving traditionally sleek and polished fondant cakes a rustic and handcrafted edge. And, because no two designs are ever the same, customers are revelling in the fact their celebration centerpiece is a one-of-a-kind masterpiece.
While it may take some time to get the hang of it, cake decorator from Sydney cake studio Sweet Bloom Cakes, Lauren Croghan, says the trend is growing in popularity, particularly as it gains exposure on social media.
“We find hand-painting on fondant is modern and stylish, which suits many of our clients,” she says acknowledging the look offers a sophisticated vintage alternative to the laid-back, rustic aesthetic that has taken off in the last few years.
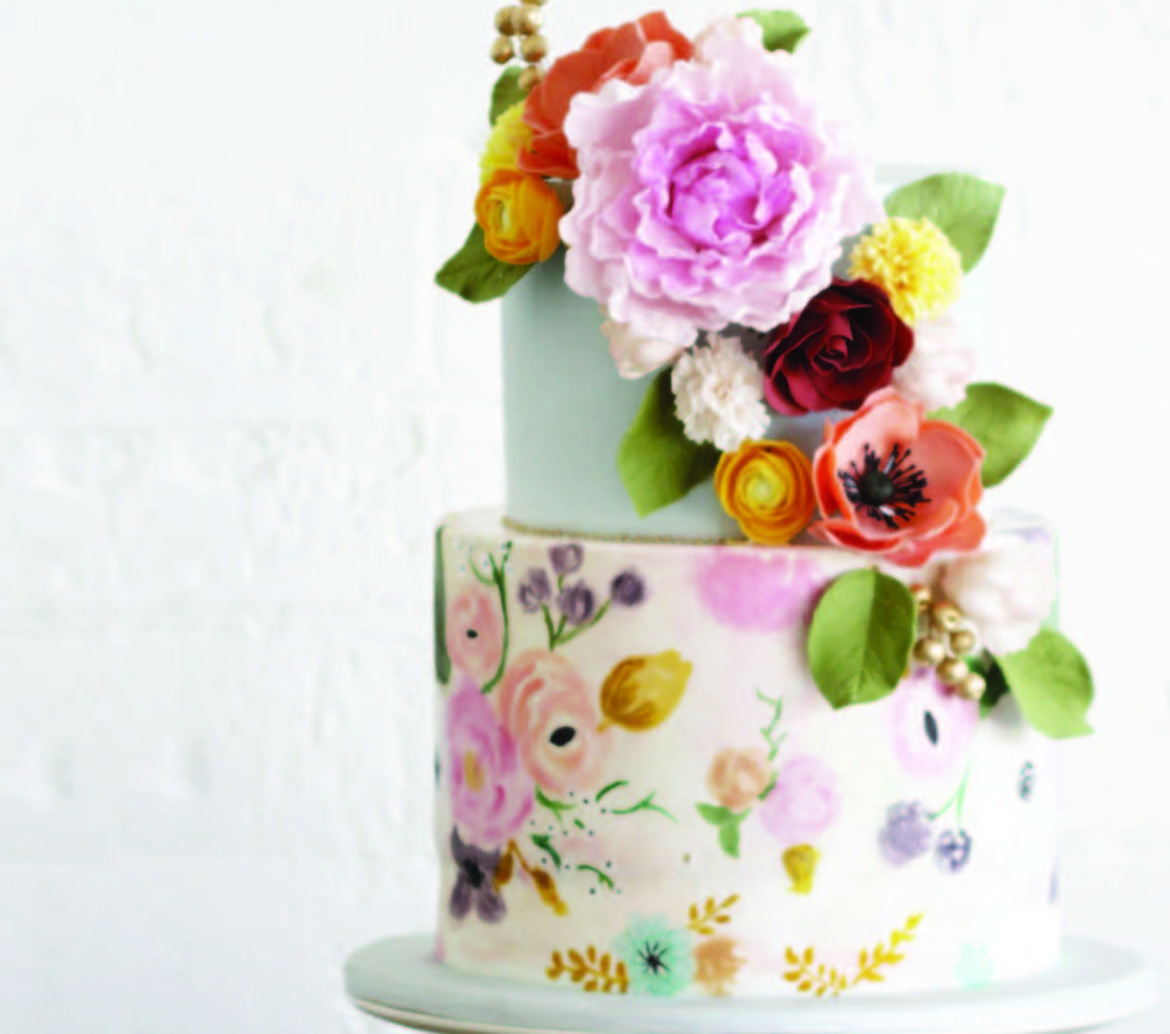
“For us, naked cakes and fondant cakes are just as popular as one another. This cake (pictured), created and painted by Sweet Bloom Cakes’ owner Dewi Kurniadi, was inspired by the client’s invitation. She gave us complete freedom, which is always wonderful.
“We chose to paint the bottom tier in the floral pattern, similar to what was on the invitation, and then create sugar flowers in the same colours to bring out and give depth to the pattern.”
Lauren, who has been painting on cakes, cookies and cupcakes for a couple of years, says the process takes lots of practice and a bit of experimentation.
“Every cake decorator has strengths and weaknesses, so hand-painting is not something everyone is comfortable with,” she says.
“It’s also quite different to other art forms. For starters, it has to be edible, so the materials are more constricted to food-appropriate colours and brushes.
“I really do enjoy the process though. As a cake baker and decorator first, and an artist second, I find it very fun to play around and create in such an unrestricted manner.”
BASIC ROSE CAKE DESIGN
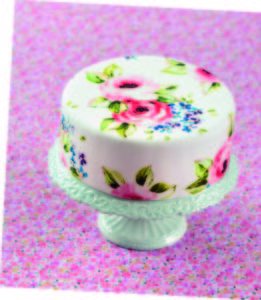
“This is the first design I created to teach to a class. Roses were an obvious choice as most of my students want to learn how to paint them, and I have painted very few wedding cakes that don’t contain a rose or two as part of the design. When you master this design, you will have learnt the foundations for creating two different versions of a gorgeous rose,” Natasha Collins, author of The Painted Cake says.
“In the rose, there should be a very light pink or white tone for the highlights, graduating to a much darker tone for the shadows and the centre. The most common problem I see when first-time artists are painting roses onto fondant is in the flatness of the painting – there isn’t enough variation in tone across each flower.
“If you make sure the centre of the flower is at least three tones darker than the lightest point, your painting will look wonderful.”
EQUIPMENT:
• Round-top paintbrushes, sizes 4 and 8
• tracing paper (template on page 46)
• non-toxic pencil
•edible food colours: pink, blue, purple, soft green, bright green, white, green, yellow, dark brown*
• 200mm cake covered in white fondant
* paste colours have an opaque quality on fondant, while gels will be more translucent.
METHOD:
1. Use a very pale tone of brown to roughly sketch out the layout of the design onto your cake. Each group of flowers you are going to paint will ultimately consist of two roses, a cluster of forget-me-nots and some leaves, but only sketch out circles to indicate the rose flowers at the point. You will add the leaves to the design after painting in the flowers. This is because the leaves are perfect for filling gaps and space in the layout, and by leaving them until last, it will help you to achieve a better overall design. So make sure there is an even amount of space around each individual group to leave enough room for the leaves; I normally allow about a 50mm gap. Once you have finished the rough sketch, use the templates and tracing paper to transfer the outline of the flowers. Enlarge the templates by 140 per cent.
2. Mix up a very pale pink tone and use your size 8 brush to create the petals of the first rose (this is the rose with a side-on view). Add some leaves around this flower in soft green, and then use a darker tone of pink to create the first layer of colour for the second rose (this is the rose that is viewed straight-on). Use light tones of blue and purple to paint the first layer of forget-me-nots. Each forget-me-not is created by painting five round petals, noting the petals of each flower should not meet in the middle to leave enough space for the yellow centre. Some of the forget-me-not petals should be painted to give the appearance they are behind the rose or the leaves. Be careful not to leave a gap between the roses and the forget-me-nots as this will look unnatural. To complete this layer, fill in the rest of the leaves using light tones of soft and bright green.
3. Now mix up slightly darker tone of pink, and work it into the centre of the first rose. Add some darker pink to one side of the flower to create the effect of shadow. Then use another, darker tone of pink for the next layer of the second rose, again focusing at the point where this rose emerges from underneath the first, and where there are leaves on top. Add some neat blue and purple to a few of the forget-me-not petals. Paint additional detail onto the leaves in the neat soft green, remembering to paint in the direction of the leave veins.
4. On the light side of the first rose, add a few strokes of white (but don’t go overboard). You can also add some highlights of the white onto the leaves and forget-me-nots. With neat pink, add more definition to the centres of the roses. On a few of the leaves, paint in extra details with neat dark green. Add a dot of yellow in the centre of each forget-me-not.
5. Once the paint from the previous stage has dried to a slight tackiness, add neat brown to the very centre of the rose leaves. Finally, with a size 4 brush, paint dots of neat purple onto the end of the petals of the forget-me-nots.
CHANNEL YOUR INNER FLOWER CHILD
Edible flowers were big in the ‘60s and ’70 and today, they’re back. And, rightly so: the right edible flower can add flavour to a recipe in a colourful and texturally interesting way.
For Bri Emery, art director and founder of designlovefest, flowers are the original cake confetti. Teaming up with Amy Merrick – the “it girl” of New York’s floristry scene – Bri counts rose petals, geraniums, carnations, violets, pansies and lilac among her favourite editions to cakes and desserts.
“Edible flowers and baking is a match made in heaven. The fragrance, the colour, the range of petal shapes… it all makes for a totally unique and interesting cake,” she says.
“A lot of people don’t realise flowers, and often the leaves, in their gardens can be eaten fresh, dried or candied. Of course, you can’t eat everything. But I do encourage everyone to do some research, go talk to their local florist at the farmers market or the garden centre, find out what is safe to eat, organically-grown and chemical-free, and experiment.”
Most edible flowers suited to sweet recipes carry a pink or purple hue. Both the flowers and the heart-shaped leaves are edible, boasting a soft and sweet flavour. Violets retain their shape well, making them a popular choice for recipes that call for crystallised petals or for fresh garnishes. Similarly, lilacs and pansies have a delicately sweet flavour, but can taste grassy if used to excess.
Lavender’s aromatic qualities are fairly strong and are known to have relaxing qualities. When eaten, however, it takes on a faint citrus flavour, not dissimilar to marigolds. The base of honeysuckle flowers also hold a sweet tasting nectar that promises not to overpower subtle flavours.
“It’s a simple process: To prepare your flowers, thoroughly wash and dry the flowers. Generally only the petals will be edible, so avoid eating any stem, leaf or stamens. You want to avoid eating any pollen, and people with allergies should be extra careful when eating flowers,” Bri says.
To avoid wilting and discolouration, Bri recommends cutting flower heads off from the stem as close to serving as possible.
“Many flowers will last longer when kept in a refrigerator, but it’s best to keep them attached to the stem in water until immediately before use. Once cut, they will look fresh for about an hour at a comfortable room temperature,” she says.
“Many petals are nearly tasteless and can dress up everything from baked goods to salads, soups and vegetables. Some flowers have more of a herbal or spicy flavour – such as nasturtiums and flowering herbs – and those are best left for savoury dishes.”
CRYSTALLISED FLOWER PETALS AND FRUITS
Preparation time: 20–30 minutes, plus drying
INGREDIENTS:
2 egg whites
Pinch of salt
200g caster (superfine) sugar
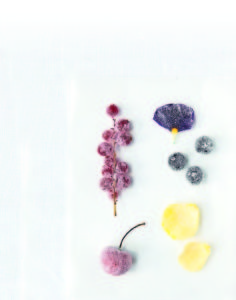
Selection of edible flowers: rose petals, pansies or violets
Selection of fruits: grapes, cherries, blueberries, strawberries, redcurrants etc.
METHOD:
1. Line a baking tray with baking paper.
2. Place the egg whites and salt in a small bowl and beat gently until slightly foamy.
3. Place the sugar in a shallow bowl.
4. Using a pastry brush, lightly brush the fruits and petals with some egg white, making sure that they are all covered in a thin layer, then dredge the fruits and petals in the sugar, making sure that they are completely coated. Shake off any excess sugar and place on the prepared baking tray. Leave to dry completely in a cool dry place for at least 3 hours.
5. You can use these to decorate cakes. The crystallised flowers may be stored in an airtight container in a cool dry place for up to a week. The fruits will keep for up to 2-4 days.
DON’T STOP ‘TILL THE TOP
While you’re at the famers’ market choosing edible flowers, pick up a few more for on-the-top flair. Always romantic, versatile, colourful and fragrant, fresh flowers offer a dramatic final touch to a cake. Top blooms for 2015 – particularly for blushing brides – include English roses, peonies, hydrangeas and ranunculus. Greenery; herbs like rosemary and mint, lemon leaf, magnolia leaf, ivy and maidenhair fern, are also being strung together and used in surprising ways on and around cakes.
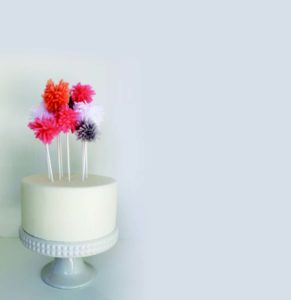
For bursts of colour that will never wilt, shrivel and die, consider the old-fashioned pom pom. Delightful in yarn or tissue paper, these frilly and fun toppers are inexpensive, easy to personalise and foolproof.
YARN CAKE TOPPER
All you need for this simple decoration is yarn or wool, white lollipop sticks and a hot glue gun.
1. Start by making the pom pom, just like you did in primary school. Wrap the yarn around your fingers. The more times you wrap it around, the plusher the pom pom will become. Wrap it around your fingers about 100 times for a large pom pom.
2. With the same strand of yarn, wrap once around the center of your circle and tie off (at around 15cm) so it looks like a little bow. Double knots work best.
3. Cut the ends/loops with scissors and use your fingers to fluff into a perfect little ball.
4. Fluff out the ends of your yarn. You can shape the pom pom with scissors so no pieces of wool hang out.
5. Add a bit of hot glue to the end of your stick.6. Insert the end of the stick into the middle of your yarn ball and allow it a few seconds to dry before letting go
CHALK IT UP
Chalkboard cakes became a popular design request for cake decorators last year in the US, especially by alternative couples throwing vintage, rustic-style weddings. It’s not surprising, chalkboard signage and papercrafts have been trending in the wedding scene for a while now.
The ‘chalkboard’ is simply black fondant, while the ‘chalk’ can be made with white candy and granulated sugar (remember candy cigerettes?). Black fondant contrasts dramatically with pretty pink and white florals – fresh or sugar-based – as well as greenery. For a classical edge, consider drop string piping and gold accents.
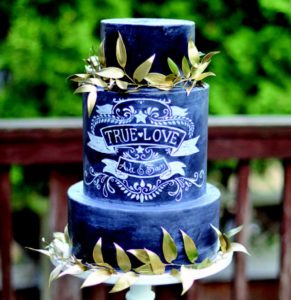
If black icing is too far on the wild side, introduce this trend with a chalkboard cake topper saying “I do”… just practice your cursive first.

COMMENTS