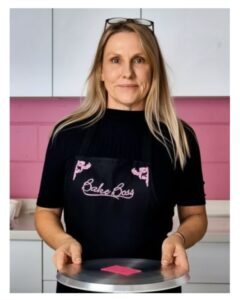
We’re seeing it all across social media – vintage piping and decorations are making a serious comeback! Trina Thomson from Bake Boss shares how to bring this style to your bakery through elevating slab cakes.
It is not secret that slab cakes are an incredibly versatile and commercially smart option for bakeries.
Keeping that in mind, cake designer, content creator and educator Trina Thomson from Bake Boss said these cakes also provide the perfect option for bakeries to tap into more niche cake decorating trends.
Most recently, this has included a resurgence of vintage piping.
“Vintage piping has a nostalgic charm that resonates with today’s customers,” Trina said.
“Styles inspired by Lambeth piping [a decorating style from the 1930s] bring a sense of elegance that feels both timeless and charming. For bakers, this trend is a chance to showcase skill while creating cakes that look amazing on social media and in shop displays.
“By creating some of these designs, bakers can level up and start to command customer premium prices.”
When trying your hand at vintage piping on slab cakes, Trina said it was important to remain consistent and have a well thought out plan before you get to work.
“Start with a smooth, well-chilled base layer of buttercream, so your piping sits cleanly on the surface,” she said.
“Planning your design before piping helps maintain balance and symmetry across the larger surface area. Using the correct piping tips and maintaining steady pressure ensures crisp details, which is especially important for decorative borders and vintage-style piping.”
Although intricate in appearance, Trina said with practice vintage piping is a decorating skill all bakers can learn.
“Bakers can improve quickly by learning a handful of classic piping techniques and repeating them until they become second nature,” she said.
“Watching tutorials, attending classes and studying traditional cake decorating styles can also be helpful. Experiment and develop your own creative voice.”
 About Trina Thomson:
Trina Thomson is a cake designer, content creator and educator with Bake Boss, one of Australia’s leading baking supply retailers. With a background in fine arts and a winner of multiple industry awards, she specialises in helping bakers develop practical decorating skills and creative confidence. Through demonstrations, classes and digital content, Trina shares techniques that make professional cake decorating accessible to both home bakers and industry professionals.
Coffee caramel pralines
WHAT YOU NEED
For the cake
250g unsalted butter, softened
250g caster sugar
4 large eggs
2 tsp vanilla extract
250g self-raising flour
100ml milk
For the Decorator’s Buttercream (Half Butter / Half Shortening)
200g unsalted butter, softened
200g vegetable shortening
800g icing sugar, sifted
2 tsp vanilla extract
2–4 tbsp milk or cream)
Gel food colouring (we use Vivid gel in navy)
Implements
9 × 12 inch (23 × 30cm) cake tin
Baking paper
Stand mixer or hand mixer
Offset spatula
Bench scraper
Piping bags
Assorted piping tips (shell, ruffle and round tips)

WHAT TO DO
Bake the cake
Preheat oven to 170°C fan-forced (180°C conventional). Line a 9 × 12 inch cake tin with baking paper.
In a stand mixer, beat the butter and caster sugar together for 3–4 minutes until pale and fluffy.
Add the eggs one at a time, mixing well between each addition.
Stir in the vanilla extract.
Add the self-raising flour in two additions, alternating with the milk. Mix until just combined.
Pour the batter into the prepared tin and smooth the surface evenly with an offset spatula.
Bake for 30–35 minutes, or until a skewer inserted into the centre comes out clean.
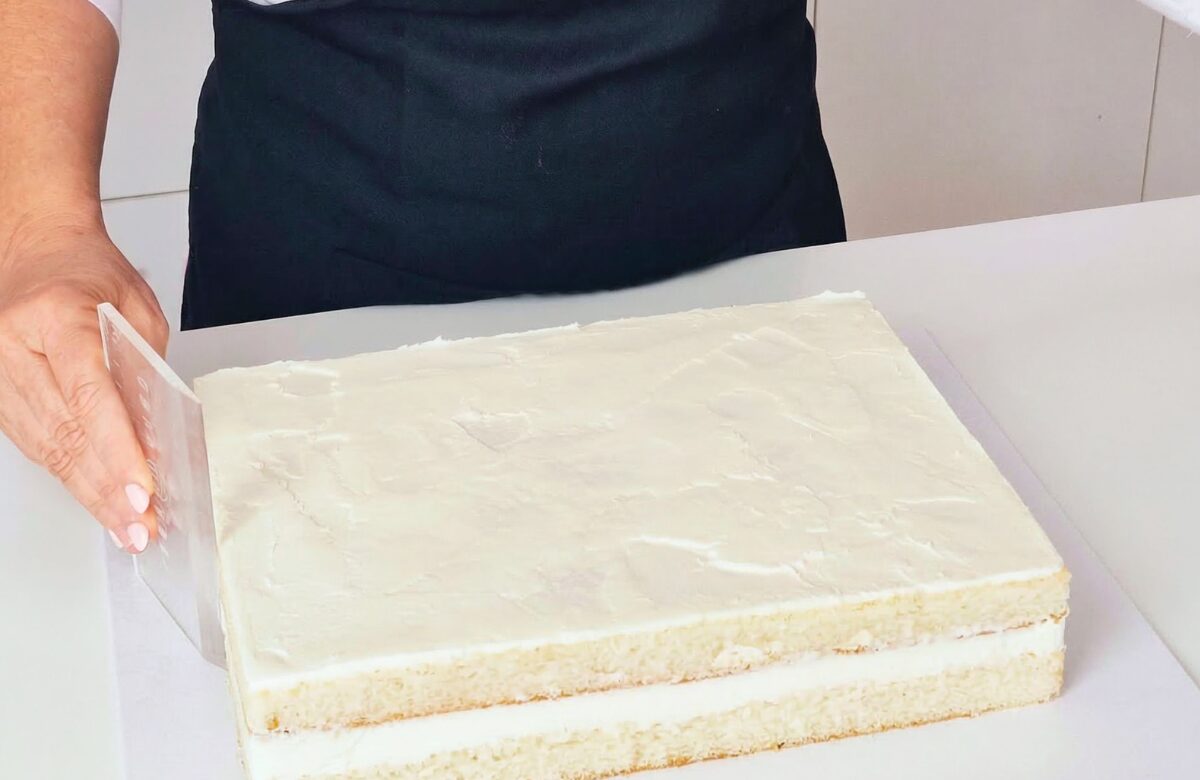
Allow the cake to cool completely in the tin before turning out onto a board ready for decorating.
Make the Decorator’s Buttercream (Half Butter / Half Shortening)
In a stand mixer fitted with a paddle attachment, beat the butter and vegetable shortening together for 3–4 minutes until smooth and pale.
Gradually add the icing sugar, mixing well after each addition.
Add the vanilla extract and 2 tablespoons of milk or cream. Beat until the buttercream becomes smooth, light and pipeable.
If needed, add an additional tablespoon or two of milk to achieve the desired piping consistency.
Colour most of the buttercream pale blue, reserving a small portion to colour a slightly darker shade for decorative accents.
Decorator’s Tip`
A half butter, half shortening buttercream is ideal for decorative piping because it holds its shape well and remains stable in warm conditions. This makes it particularly suitable for vintage piping styles.
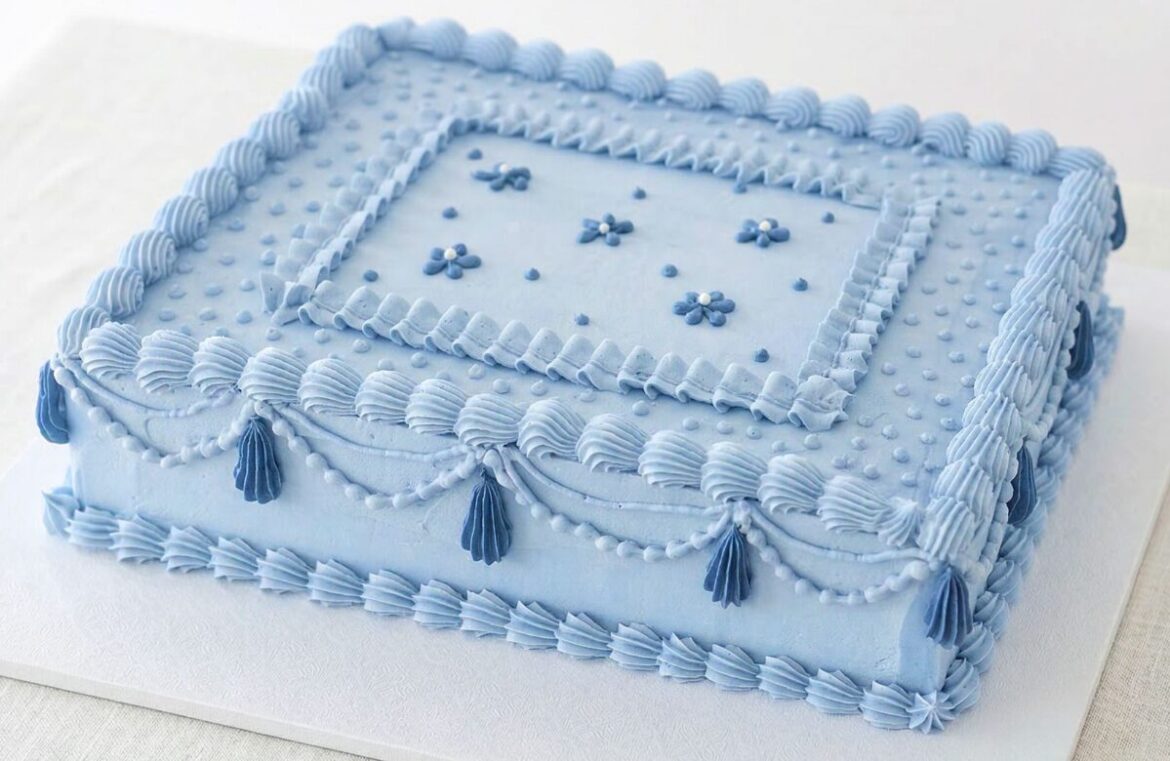
Step-by-Step: Vintage Piped Slab Cake
Step 1
Level and fill the slab cake, then cover the top with a thin layer of buttercream. Use a scraper or palette knife to smooth the surface. Chill top coat for at least 15 minutes.
Step 2
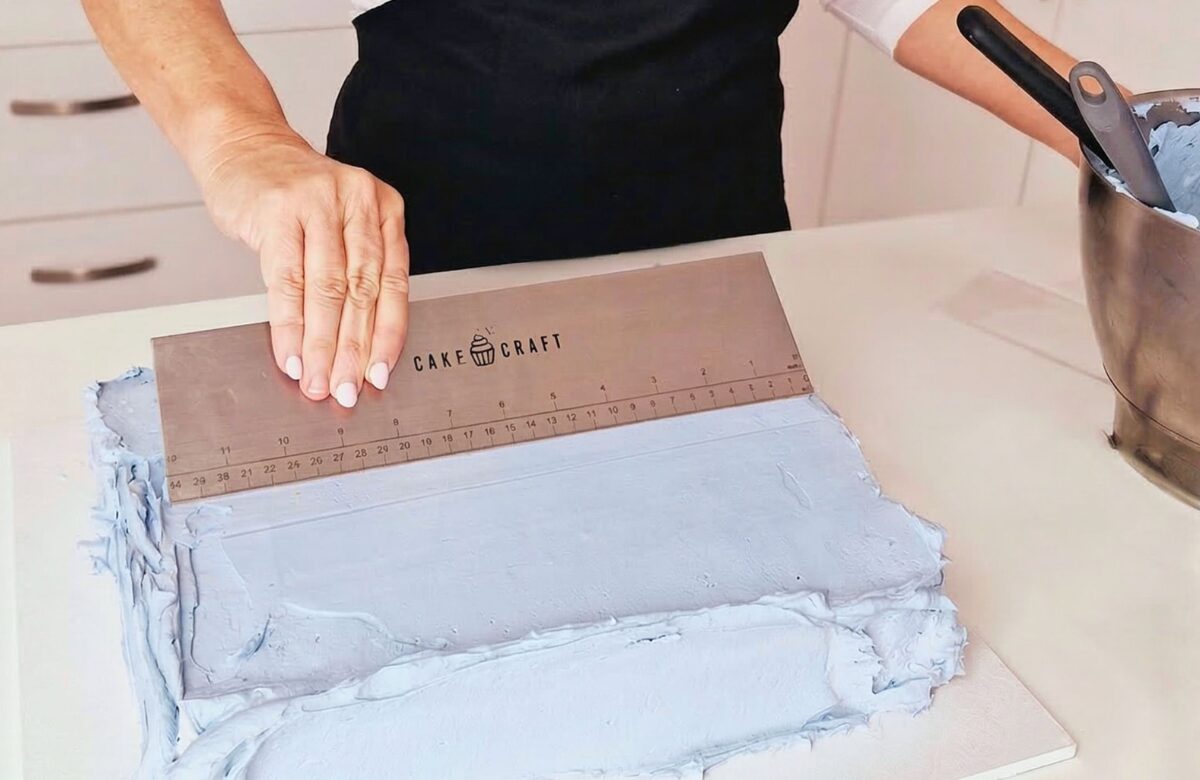
Apply buttercream around the sides and top of the cake, building up an even coating. Use a straight scraper to sharpen the edges and create a clean, flat finish.
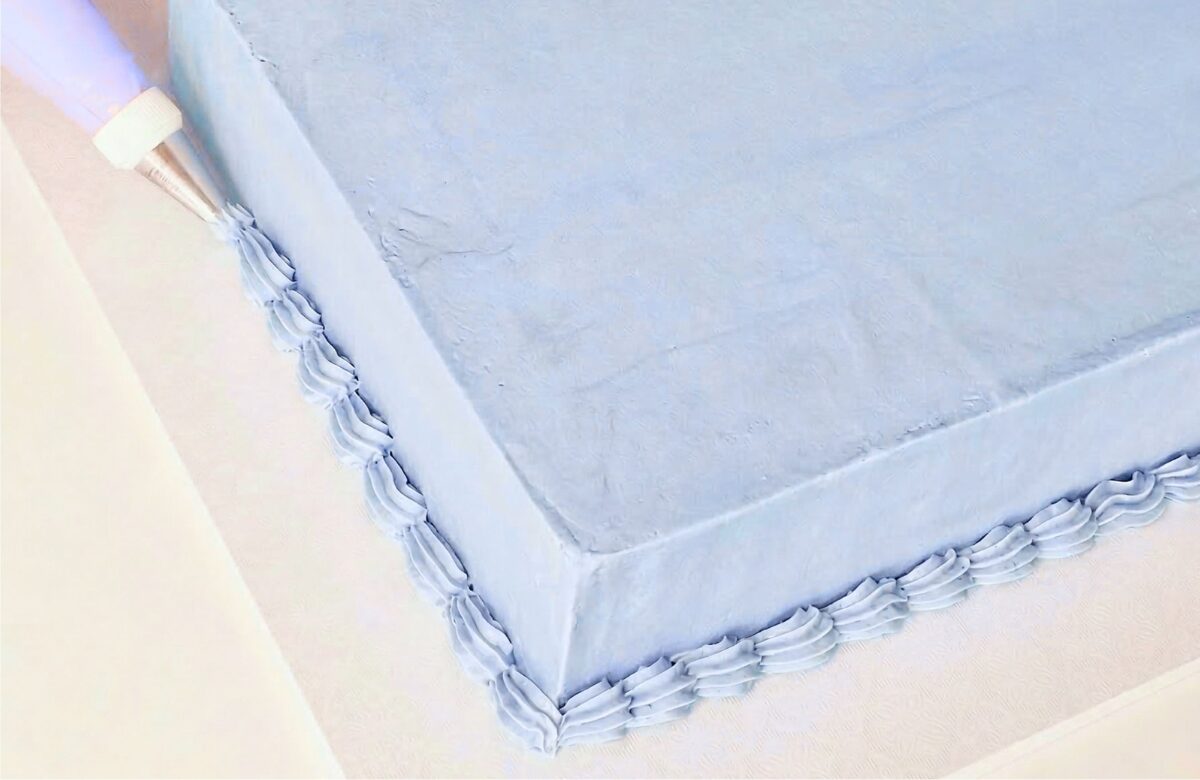
Step 3
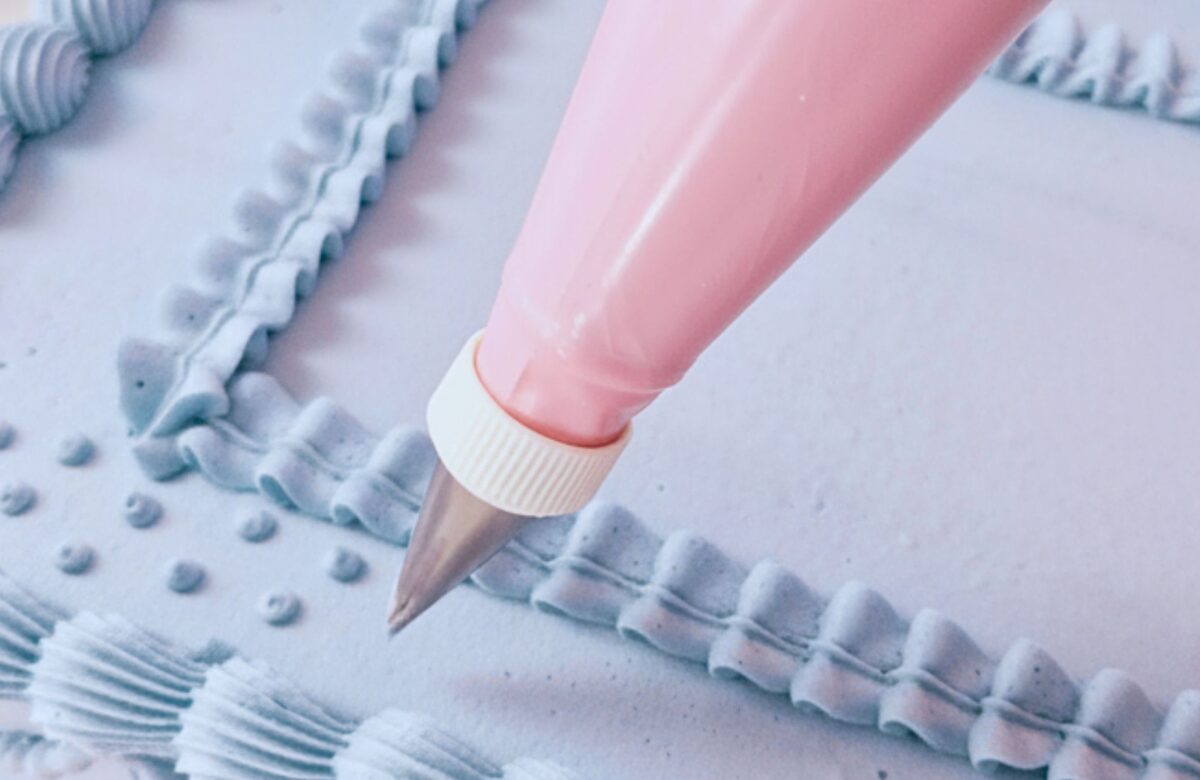
Pipe a shell border around the base of the cake using a star tip. This creates a neat foundation and frames the cake. We used a #21 piping tip for the base.
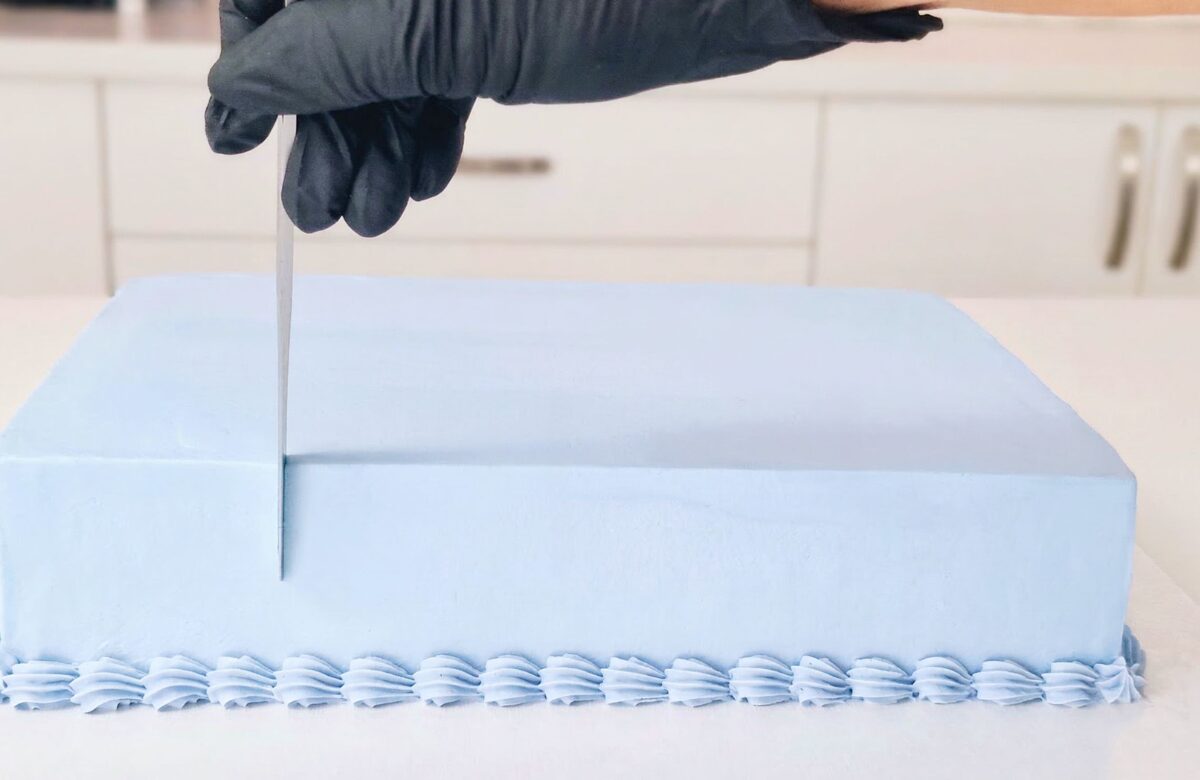
Step 4
Mark divides on your cake to create guides. Marking the centre panel first helps keep the design even. We separated the long side into four and the short side into three sections.
Step 5
Pipe a matching shell border around the top outer edge of the cake, keeping the spacing even all the way around. We used a slightly larger 4B and piped slightly over to allow more space on the top surface and to create an aesthetic ‘lidded’ appearance.

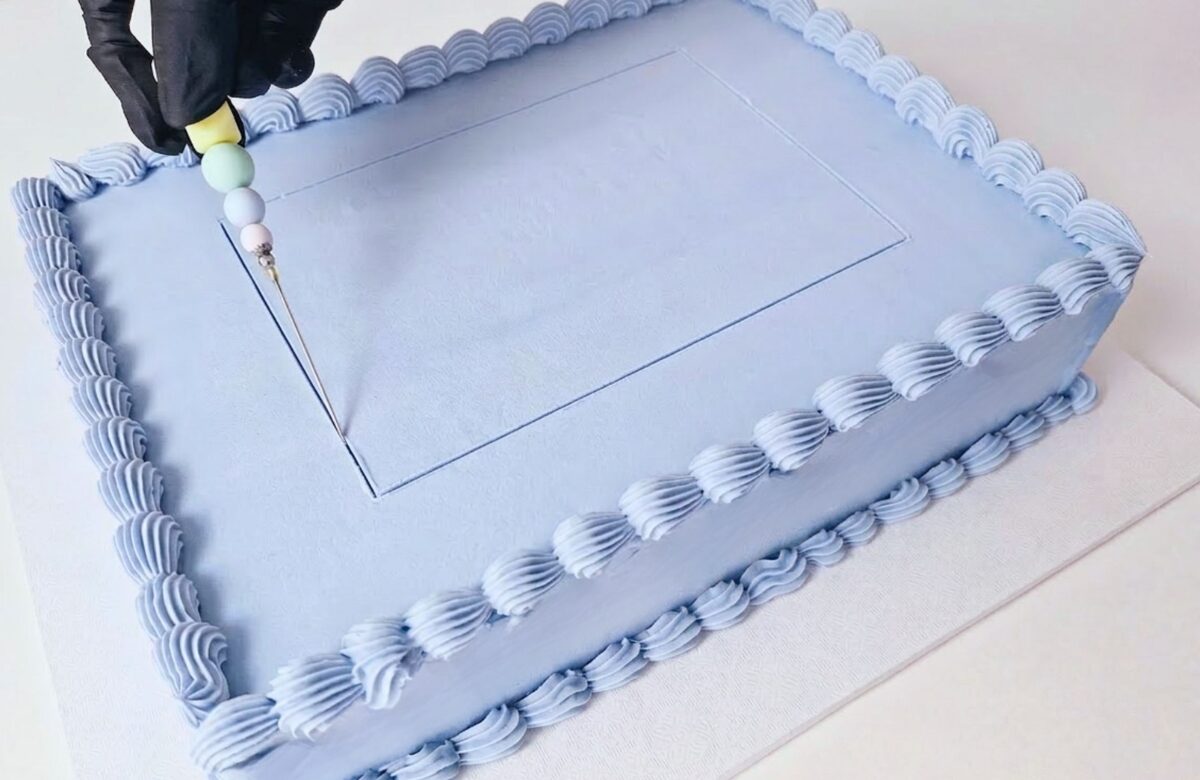
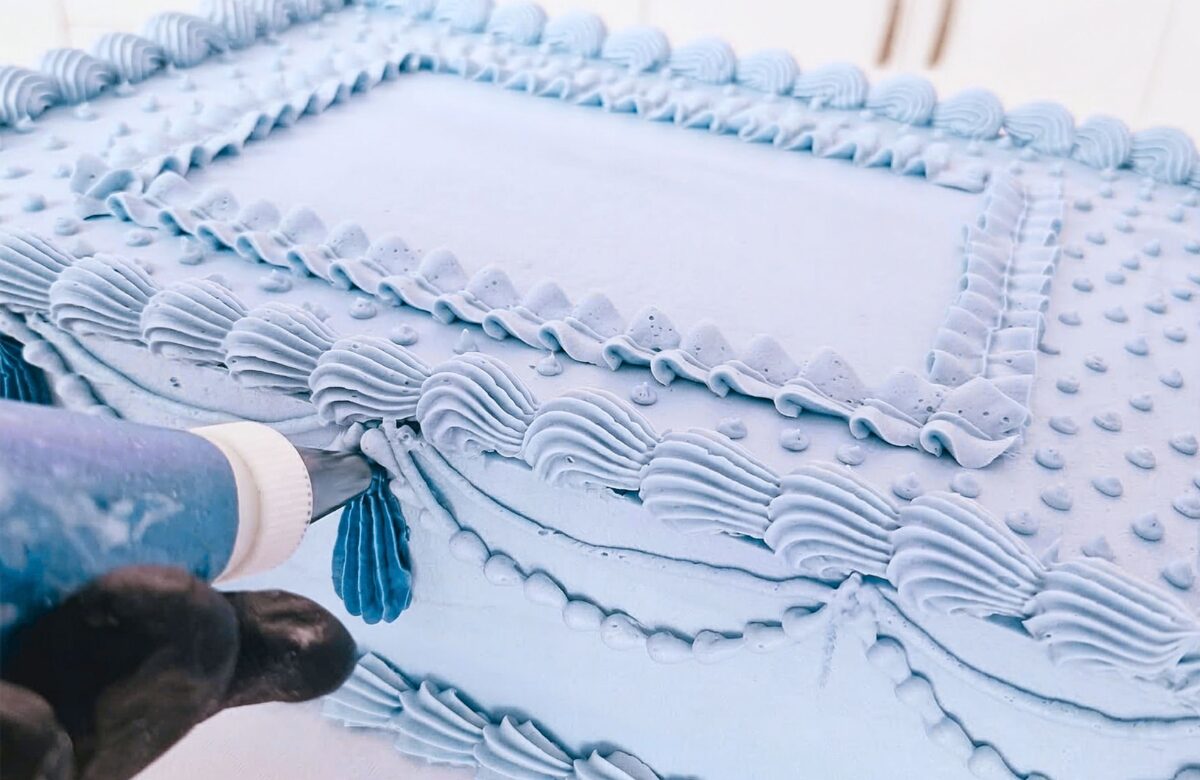
Step 6
Mark out a neat inner rectangle on the top of the cake. This acts as a guide for the central design panel and helps keep the piping balanced.
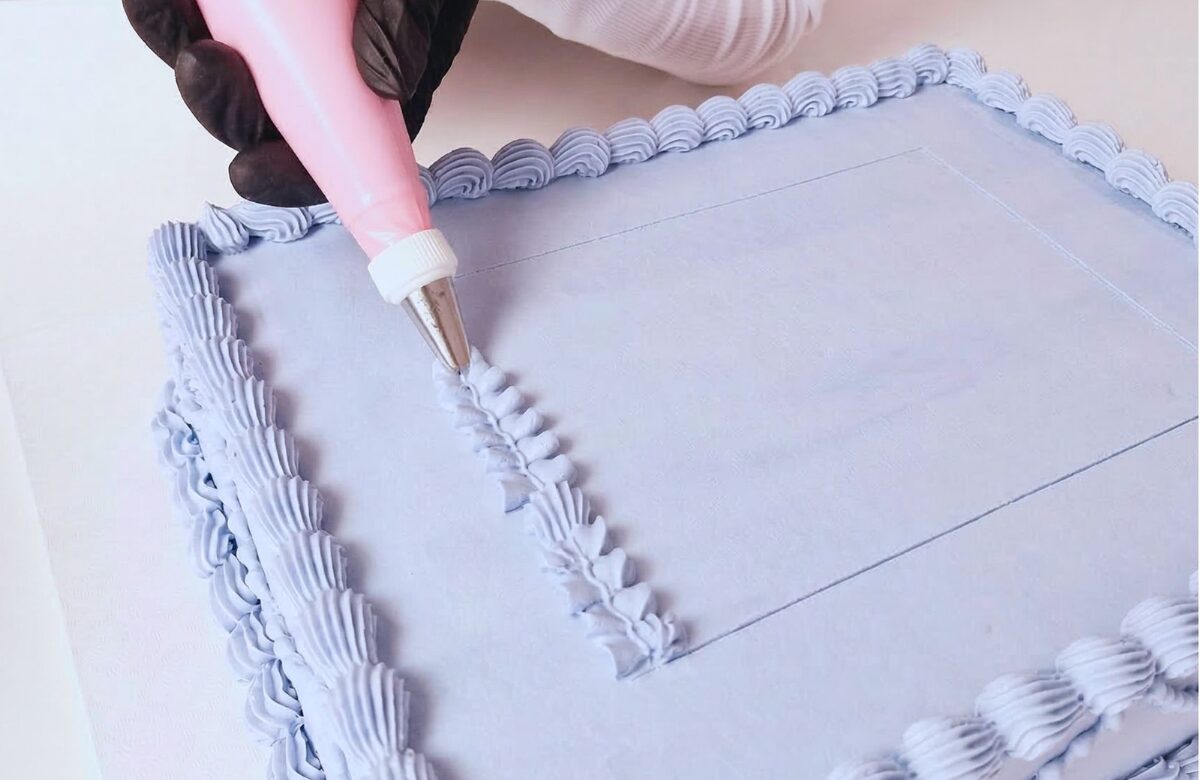
Step 7
Using a ruffle or petal-style tip, pipe a decorative ruffled border around the inside rectangle. Keep the pressure steady so the frills stay even and delicate. We used a #67 leaf tip.
Step 8
Pipe small dot details around the top surface of the cake to add texture and that classic vintage look.
Step 9
Pipe a dot-style swag border around the upper side edge of the cake using your guides as a reference. Work in short, even sections to keep the drapes symmetrical. You can add extra lines or string work at this point, depending on your skills and variety of piping tips. Pipe darker accent tassels at regular intervals where the swags meet. These create contrast and give the cake its Lambeth-inspired finish.
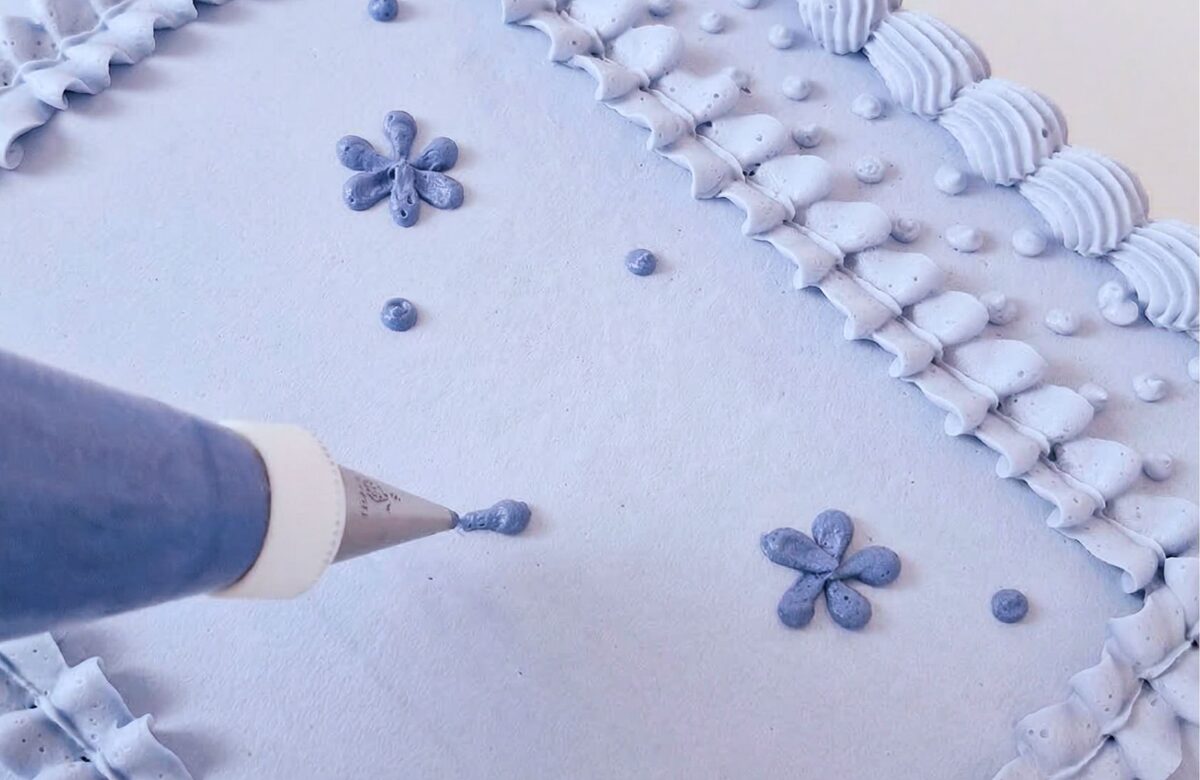
Step 10
Pipe small five-petal flowers inside the central panel using the darker buttercream. Space them evenly so the design feels balanced. Add piped dots or sugar pearls in the flower centres. Add small piped dots between the flowers to fill the space without overcrowding the design.
Step 11
Chill briefly if needed to firm the buttercream before transporting or displaying.


COMMENTS